Python智能语音机器人
先看效果视频 click here => https://www.yuque.com/docs/share/24f6227b-0785-4d90-a319-94bd0deaceab?
千万别看名字高大上,实际很简单,会简单使用Python调用API就行(手动滑稽)
主要使用的套餐如下:
Python模块:
Python基础 + pyAudio框架 + SpeechRecognition框架 + wave模块 +tqdm模块
应用平台:
百度AI开放平台 + 图灵机器人
主要思路:
利用Python的SpeechRecognition进行语音录入,Then发送到百度AI平台识别,Then将识别的信息发送到图灵机器人以获取对话内容,Then将返回的对话内容发送到百度AI平台传回TTS语音,Then用Python的pyAudio播放绕来绕去没绕晕了吧,嘿嘿
应用平台:
想了想还是先说这个吧~不然看下边的时候怪懵逼的~
这是百度AI开放平台 => https://ai.baidu.com/
去注册个账号,实名一下(反正免费的,实名了有好处~~~)
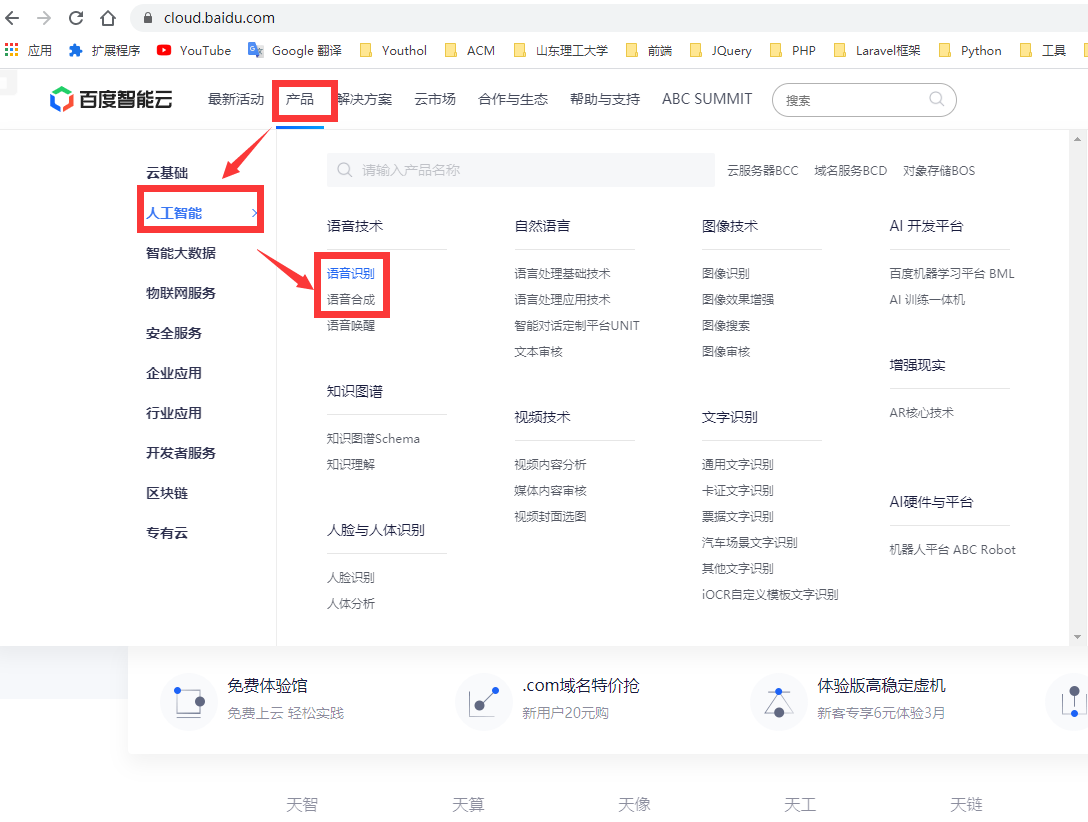
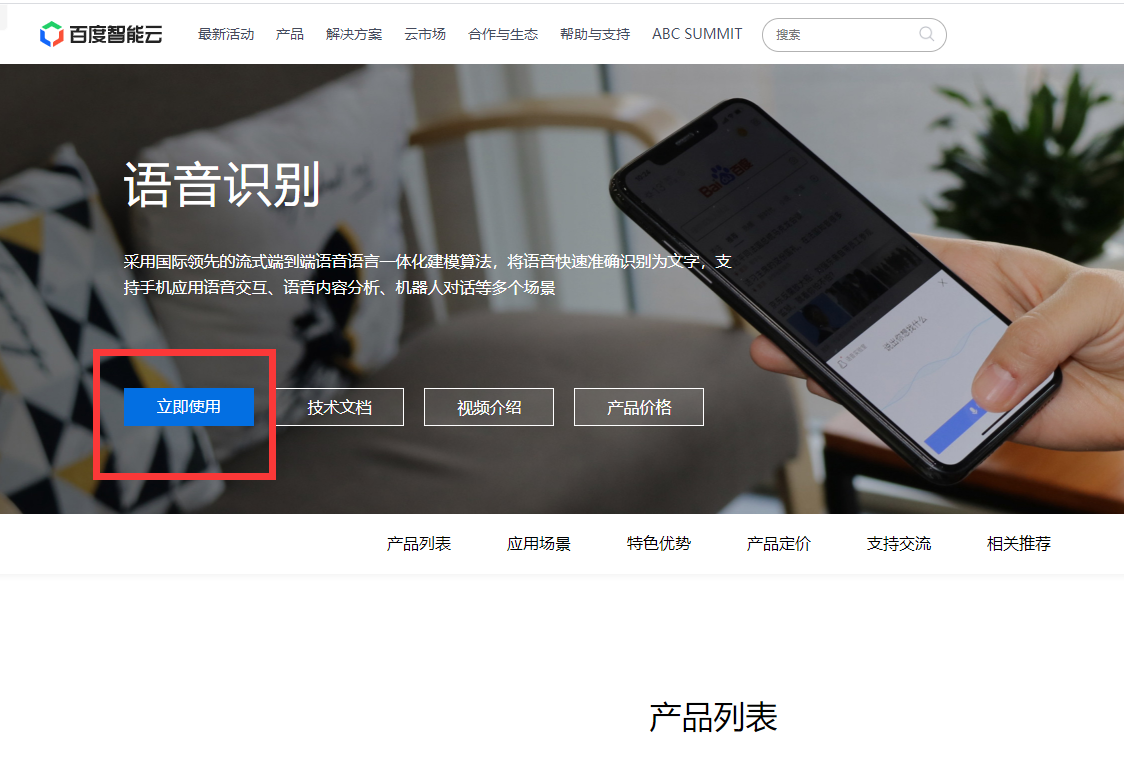
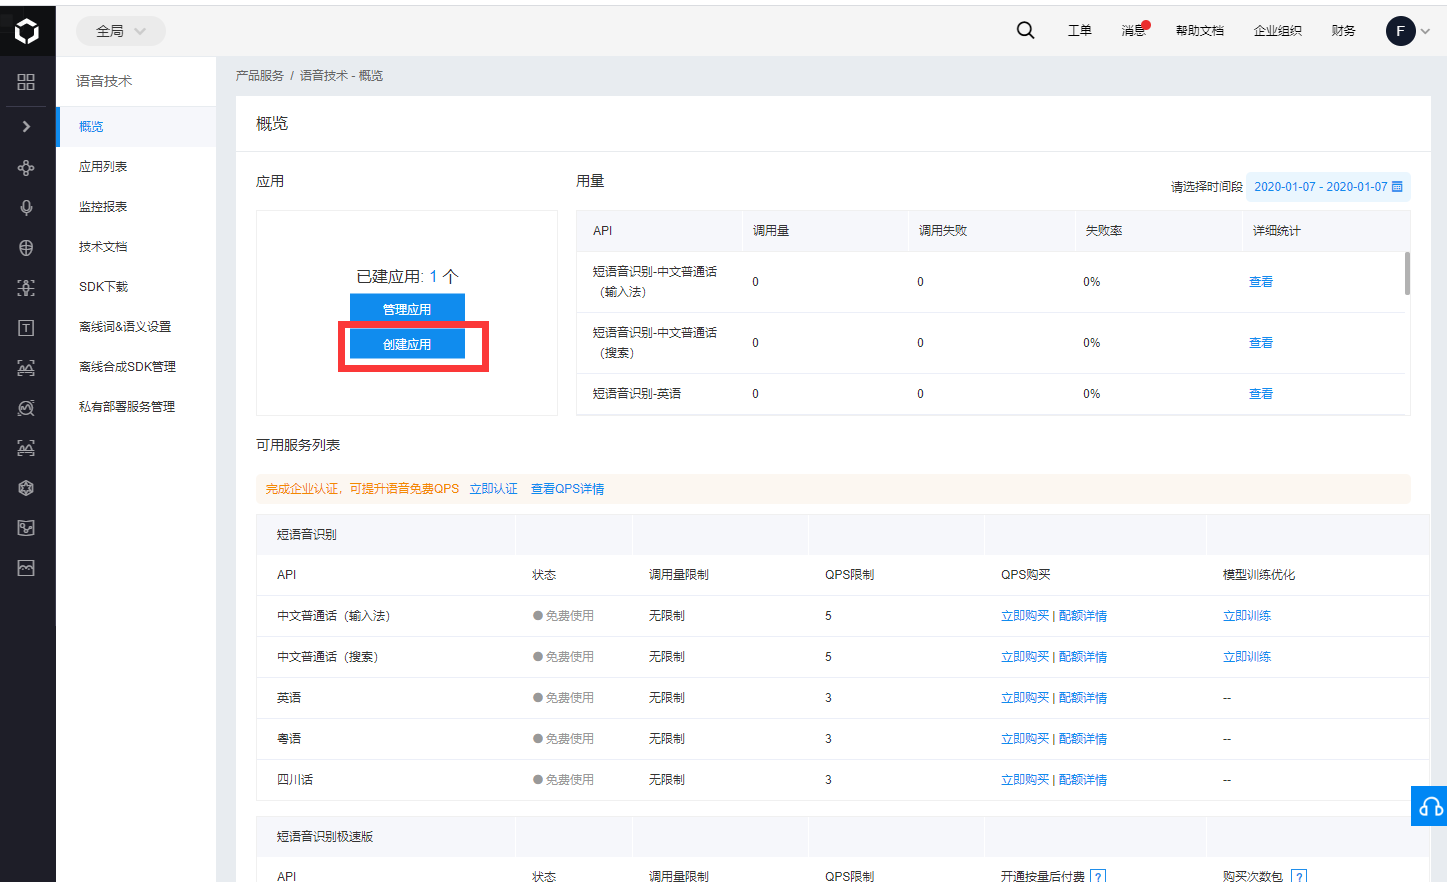
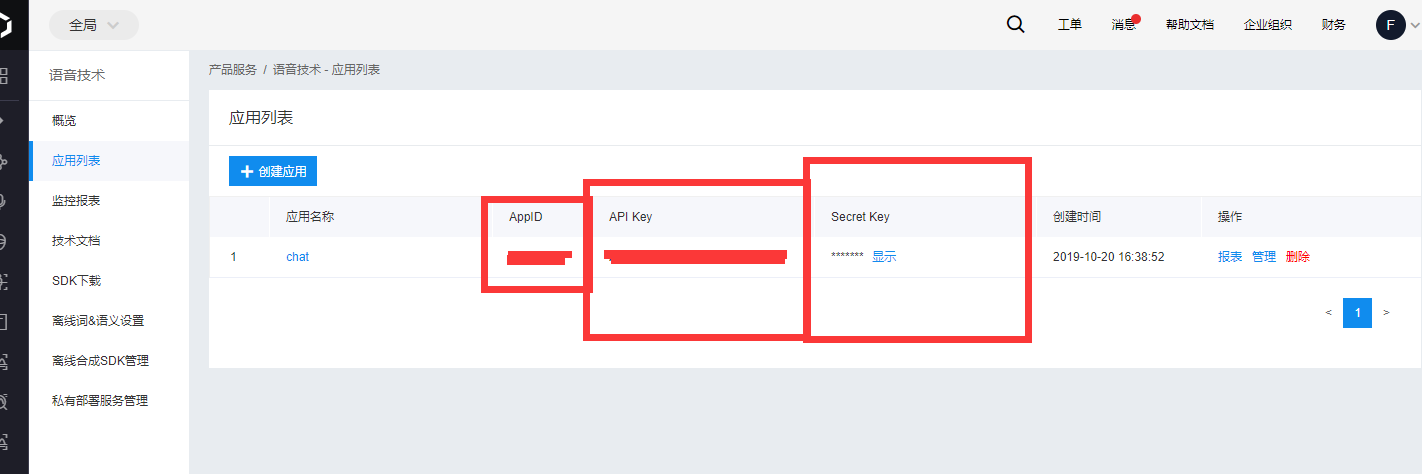
按照以下图片依次点击创建应用,默认就好 语音识别 (还有一个语音合成),创建完了后会有那些东西的~~~


这是百度他们平台的产品文档,以你们的聪明才智很轻松就明白了(一定要好好阅读) => https://cloud.baidu.com/doc/SPEECH/s/ijwvy5keu
这是GitHub上他们的一个示例,你要能看懂就去看看吧 => https://github.com/Baidu-AIP/speech-demo
这是图灵机器人 => http://www.turingapi.com/
还是老样子注册实名读产品文档~~~~
文档入口 => http://www.tuling123.com/help/h_cent_webapi.jhtml?nav=doc
Python 模块:
(我是封装到一个类里的,两个平台所需的一些东西分步说的时候没展示出来,最后会有一个总的)
主要使用SpeechRecognition的录音功能
安装:
pip install SpeechRecognitionLook here https://pypi.org/project/SpeechRecognition/
 '''
    调用speech_recognition模块录音方法,从系统麦克风拾取音频数据,
    采样率为 16000(百度语音 Api 最高支持到 16k 的采样率)
    Then将采集到的音频数据以 wav 格式保存在当前目录下的 recording.wav 文件中,
    供后面的程序使用
    '''
    def recordBySr(self, rate=16000):
        r = sr.Recognizer()
        with sr.Microphone(sample_rate=rate) as source:
            print("please say something")
            audio = r.listen(source)

        with open("recording.wav", "wb") as f:
            f.write(audio.get_wav_data())
百度语音对于SpeechRecognition录音的 识别
先look look参考文档(
我这蹩脚的英语又来了) = > http://xcx1024.com/ArtInfo/643201.html百度自己的一套Api
666
 '''
    将 SpeechRecognition 录制的音频格式为.wav文件使用Post方法上传上传至百度语音的服务,
    返回识别后的json数据并抽取result的文本进行输出
    '''
    def recogByBaiduApi(self):
        with open('recording.wav', 'rb') as f:
            audio_data = f.read()
            # 参数'dev_pid'普通话(支持简单的英文识别)
        result = self.client.asr(audio_data, 'wav', 16000, {
            'dev_pid': 1536,
        })
        result_text = result["result"][0]
        print("you said: " + result_text)
        return result_text
重头戏来了,实现智能对话主要依靠图灵机器人的API
'''
    请求图灵,获取聊天内容
    '''
    def tuLing(self, content):
        # 图灵api
        api = r'http://openapi.tuling123.com/openapi/api/v2'#文档推荐这个接口!!!
        # userid = int(time.time())
        # 创建post提交的数据
        data = {
            "perception": {
                "inputText": {
                    "text": content
                }
            },
            "selfInfo": {
                "location": {
                    "city": "写你所在的城市",
                    "street": "你所在的路???"
                }
            },
            "userInfo": {
                "apiKey": "你个人的apiKey",
                "userId": '你个人的userId',
            }
        }
        # 转化为json格式
        jsondata = json.dumps(data)
        # 发起post请求
        response = requests.post(api, data=jsondata)
        # 将返回的json数据解码
        robot_res = json.loads(response.content)
        # 提取对话数据
        print(robot_res["results"][0]['values']['text'])
        robotRes = robot_res["results"][0]['values']['text']
        return robotRes
百度语音(TTS)对于图灵返回的文字进行语音合成
'''
    发送请求,获取语音合成.wav
    '''
    def getBaiDuTts(self, text=""):
        result = self.client.synthesis(text, 'zh', 1, {
            'per': 4,  # 发音人
            'spd': 5,  # 语速,取值0-15,默认为5中语速
            'pit': 5,  # 音调,取值0-15,默认为5中语调
            'vol': 5,  # 音量,取值0-9,默认为5中音量
            'aue': 6,  # 下载的文件格式, 3:mp3(default) 4: pcm-16k 5: pcm-8k 6. wav
        })

        if not isinstance(result, dict):
            with open('back.wav', 'wb') as f:
                f.write(result)
播放百度语音(TTS)返回的合成语音
'''
    播放百度AI合成语音
    '''
    def playAudio(self, path):
        # define stream chunk
        chunk = 1024

        # open a wav format music
        f = wave.open(path, "rb")
        # instantiate PyAudio
        p = pyaudio.PyAudio()
        # open stream
        stream = p.open(format=p.get_format_from_width(f.getsampwidth()),
                        channels=f.getnchannels(),
                        rate=f.getframerate(),
                        output=True)
        # read data
        data = f.readframes(chunk)

        # print(data)
        datas = []

        # paly stream
        while len(data) > 0:
            data = f.readframes(chunk)
            datas.append(data)
        for d in tqdm(datas):
            stream.write(d)
        # stop stream (4)
        stream.stop_stream()
        stream.close()
        # close PyAudio (5)
        p.terminate()
这里主要使用前面说的PyAudio跨平台音频I / O库,和tqdm模块,可以方便显示进程(简单说有个进度条)
网上对这个库的简介:
PyAudio为跨平台音频I / O库 PortAudio 提供 Python 绑定。使用PyAudio,您可以轻松地使用Python在各种平台上播放和录制音频,例如GNU / Linux,Microsoft Windows和Apple Mac OS X / macOS。
这个不是重点,而是在Windows平台上安装Python的一些库太令人头疼了,这个PyAudio库开始就卡住了我(手动泪奔)
解决方法(让我们少走一些弯路吧)
pip install pyaudio提示error: Microsoft Visual C++ 14.0 is required. Get it with “Microsoft Visual C++ Build Tools”: 此处省略一个链接
现在你需要到这个地址下载对应的whl https://www.lfd.uci.edu/~gohlke/pythonlibs/#pyaudio
PyAudio‑0.2.11‑cp37‑cp37m‑win_amd64.whl
cp37代表python版本号3.7,amd64代表64位
over后依照次序安装
pip install Twisted-18.7.0-cp36-cp36m-win_amd64.whl
pip install pyaudio
对这两个来个知乎解释,嘿嘿~~~ https://zhuanlan.zhihu.com/p/71235612
最后贴上封装好的类
import json
import time
import wave
import string
import pyaudio
import requests
from tqdm import tqdm
from aip import AipSpeech
import speech_recognition as sr


class SmartChatRobot(object):
    '''
    Baidu Speech API
    '''
    APP_ID = '你自己的APP_ID'
    API_KEY = '你自己的API_KEY'
    SECRET_KEY = '你自己的SECRET_KEY'

    client = AipSpeech(APP_ID, API_KEY, SECRET_KEY)

    #url = 'http://fjx.com/api/test' # 忽略当时是参加一个比赛额外加的,自己写了个测试接口返回室内温度啥的~

    '''
    调用speech_recognition模块录音方法,从系统麦克风拾取音频数据,
    采样率为 16000(百度语音 Api 最高支持到 16k 的采样率)
    Then将采集到的音频数据以 wav 格式保存在当前目录下的 recording.wav 文件中,
    供后面的程序使用
    '''
    def recordBySr(self, rate=16000):
        r = sr.Recognizer()
        with sr.Microphone(sample_rate=rate) as source:
            print("please say something")
            audio = r.listen(source)

        with open("recording.wav", "wb") as f:
            f.write(audio.get_wav_data())

    '''
    将 SpeechRecognition 录制的音频格式为.wav文件使用Post方法上传上传至百度语音的服务,
    返回识别后的json数据并抽取result的文本进行输出
    '''
    def recogByBaiduApi(self):
        with open('recording.wav', 'rb') as f:
            audio_data = f.read()
            # 参数'dev_pid'普通话(支持简单的英文识别)
        result = self.client.asr(audio_data, 'wav', 16000, {
            'dev_pid': 1536,
        })
        result_text = result["result"][0]
        print("you said: " + result_text)
        return result_text

    '''
    请求图灵,获取聊天内容
    '''
    def tuLing(self, content):
        # 图灵api
        api = r'http://openapi.tuling123.com/openapi/api/v2'
        # userid = int(time.time())
        # 创建post提交的数据
        data = {
            "perception": {
                "inputText": {
                    "text": content
                }
            },
            "selfInfo": {
                "location": {
                    "city": "淄博",
                    "street": "新村路"
                }
            },
            "userInfo": {
                "apiKey": "你自己的",
                "userId": '你自己的',
            }
        }
        # 转化为json格式
        jsondata = json.dumps(data)
        # 发起post请求
        response = requests.post(api, data=jsondata)
        # 将返回的json数据解码
        robot_res = json.loads(response.content)
        # 提取对话数据
        print(robot_res["results"][0]['values']['text'])
        robotRes = robot_res["results"][0]['values']['text']
        return robotRes

    '''
    发送请求,获取语音合成.wav
    '''
    def getBaiDuTts(self, text=""):
        result = self.client.synthesis(text, 'zh', 1, {
            'per': 4,  # 发音人
            'spd': 5,  # 语速,取值0-15,默认为5中语速
            'pit': 5,  # 音调,取值0-15,默认为5中语调
            'vol': 5,  # 音量,取值0-9,默认为5中音量
            'aue': 6,  # 下载的文件格式, 3:mp3(default) 4: pcm-16k 5: pcm-8k 6. wav
        })

        if not isinstance(result, dict):
            with open('back.wav', 'wb') as f:
                f.write(result)

    '''
    播放百度AI合成语音
    '''
    def playAudio(self, path):
        # define stream chunk
        chunk = 1024
        # open a wav format music
        f = wave.open(path, "rb")
        # instantiate PyAudio
        p = pyaudio.PyAudio()
        # open stream
        stream = p.open(format=p.get_format_from_width(f.getsampwidth()),
                        channels=f.getnchannels(),
                        rate=f.getframerate(),
                        output=True)
        # read data
        data = f.readframes(chunk)
        # print(data)
        datas = []
        # paly stream
        while len(data) > 0:
            data = f.readframes(chunk)
            datas.append(data)
        for d in tqdm(datas):
            stream.write(d)
        # stop stream (4)
        stream.stop_stream()
        stream.close()
        # close PyAudio (5)
        p.terminate()

    '''
    发送API请求,查询最新温度,PHP实现
    '''
    def QrIndrTemp(self):
        res = requests.get(self.url)
        data = res.json()
        current = data[1]["temperature"]
        return current

    '''
    检测输入语音的关键字
    '''
    def find_string(self, s, t):
        try:
            str.index(s, t)
            return True
        except(ValueError):
            return False

    '''
    条件判断函数,根据关键字判别,决定是否激发其他功能  这个除了谈话结束别的忽略,原因同上
    '''
    def cdJudument(self, result_text):
        interruptStr = "谈话结束"
        inquireTem = "查询一下室内温度"
        if interruptStr in result_text:
            res = self.find_string(result_text, interruptStr)
            if res:
                end = "那我就和你说拜拜啦"
                self.getBaiDuTts(end)
                self.playAudio("back.wav")
                exit(0)
            else:
                pass
        elif inquireTem in result_text:
            res1 = self.find_string(result_text, inquireTem)
            if res1:
                current = self.QrIndrTemp()
                currents = "当前最新查询到的室内温度为" + str(current) + "摄氏度"
                self.getBaiDuTts(currents)
                self.playAudio("back.wav")
                time.sleep(1)
            else:
                pass
        else:
            robotRes = self.tuLing(result_text)
            self.getBaiDuTts(robotRes)
            self.playAudio("back.wav")
            time.sleep(1)

    def dialogue(self):
        while True:
            # 输入对话内容
            self.recordBySr()
            result_text = self.recogByBaiduApi()
            self.cdJudument(result_text)


if __name__ == '__main__':
    test = SmartChatRobot()
    test.dialogue()

还不快抢沙发